
In the cozy embrace of our kitchens, where the aroma of home-cooked meals fills the air, there lies the heartwarming tradition of preparing a beef arm roast. This culinary delight, known for its tender, fall-apart texture and rich flavors, stands as a testament to the art of slow cooking. As we embark on this culinary journey, we’ll explore not just the steps to creating the perfect beef arm roast but also the nuances that make it a beloved dish for gatherings and quiet dinners alike. From the initial selection of ingredients to the final touches that elevate the dish, this article promises to be your guide through the savory world of beef arm roast, ensuring that every bite is a story worth savoring.
Introduction to Beef Arm Roast
Ah, the beef arm roast—a cut that might not win any beauty contests at first glance but certainly knows how to charm its way into the hearts of those who dare to slow cook it to perfection. Nestled within the shoulder of the cow, this cut embodies the essence of comfort food, making it a staple for those chilly nights when all you crave is warmth and wholesomeness.
What is Beef Arm Roast?
At its core, the beef arm roast is a testament to the beauty of slow cooking. Originating from the shoulder area, often referred to as the chuck, this cut is laced with connective tissues and marbling that promise a tender, flavorful feast when given the time to gently break down. It’s a cut that’s both versatile and forgiving, lending itself to a myriad of culinary creations from the heartwarming pot roast to the festive Sunday dinner centerpiece.
Brief Overview of its Popularity and Culinary Uses
The beef arm roast doesn’t just stop at being a delicious meal option; it’s a canvas for creativity in the kitchen. Its rich beef flavor and tender texture make it ideal for shredding into sandwiches, rolling into enchiladas, or even starring in a hearty casserole. This cut’s popularity isn’t just due to its taste but also its cost-effectiveness, making it a go-to option for families looking to enjoy a luxurious meal without breaking the bank.
Moreover, the beef arm roast is a cut that celebrates the tradition of slow cooking, inviting chefs and home cooks alike to take a step back from the hustle and bustle of life and enjoy the process of cooking. It’s a reminder of the times when meals were a labor of love, simmering away, melding flavors and textures into something truly special.
So, as we delve deeper into the nuances of preparing a beef arm roast, let’s embrace the journey, from the careful selection of ingredients to the slow, loving process of bringing this dish to life. After all, good things come to those who wait, and a perfectly cooked beef arm roast is certainly worth every minute.
Ingredients and Preparation
Embarking on the culinary adventure of preparing a beef arm roast, the first step is akin to gathering your palette of colors before painting a masterpiece. The ingredients and their preparation are crucial, setting the stage for the flavors and textures that will unfold.
Ingredients
To bring this dish to life, you’ll need:
- Arm Roast: The star of the show, a 3lb bone-in arm roast, trimmed of excess fat, promises the most flavor.
- Seasonings: A simple yet powerful combination of salt and freshly ground black pepper to enhance the natural flavors of the meat.
- Olive Oil and Butter: For searing the roast, creating a rich base for the cooking process.
- Garlic: Peeled and smashed cloves add a depth of flavor that infuses the meat during the slow cooking.
- Red Wine: A dry red, like Cabernet, deglazes the pan and adds a complex flavor profile to the dish.
- Beef Stock: Used as the cooking liquid, it further enriches the meat’s taste and tenderness.
- Herbs: Fresh sprigs of rosemary and thyme, along with bay leaves, introduce aromatic notes that complement the beef beautifully.
Substitutions and variations are welcome, catering to dietary restrictions or personal preferences. For instance, non-alcoholic substitutes for red wine or different herbs to match your taste palette.
Preparation Before Cooking
Before the roast even sees the oven, there’s a bit of prep work that promises to pay off in flavor dividends:
- Season Generously: Liberally seasoning the arm roast with salt and pepper not only flavors the meat but also aids in creating a delicious crust when seared.
- Searing: Heating olive oil and butter in a large Dutch oven or heavy-bottomed pot, sear the roast on all sides. This step is non-negotiable, folks! It locks in those juices and starts building a flavor foundation that’s nothing short of magical.
- Garlic and Wine: After searing, the same pot becomes the stage for softened garlic and the rich reduction of red wine, scraping up all those tasty browned bits from the bottom. This mixture will envelop your roast, whispering promises of a mouthwatering finish.
The preparation phase is all about building layers of flavor that will meld and mellow as the roast slowly transforms in the oven. It’s a dance of ingredients, each step choreographed to bring out the best in this humble cut of meat. So, take your time, enjoy the process, and get ready for the cooking magic that follows.
Cooking Method
With the stage set by our meticulously chosen ingredients and their preparation, we now venture into the heart of the matter: the cooking method. This is where patience becomes a virtue, and the slow melding of flavors creates a dish that’s more than the sum of its parts.
Step-by-Step Cooking Instructions
- Preheat and Pot Ready: Begin by preheating your oven to a cozy 300°F (150°C). Meanwhile, get your large Dutch oven or heavy-bottomed pot back on the medium-high heat on the stovetop, ready for its next act.
- Sear the Roast: Recall the beautifully seasoned roast? It’s time for its second searing, this time in the pot with the olive oil and butter mixture, browning it on all sides. This step is crucial for developing those deep, complex flavors we’re after.
- Garlic and Red Wine Magic: Once the roast is seared and set aside, lower the heat and add your smashed garlic to the pot. After a minute or two, pour in the red wine, allowing it to simmer and reduce slightly, scraping up the flavorful fond (those browned bits) from the bottom of the pot.
- Bath Time for the Roast: Return the roast to the pot, now a treasure trove of flavors, and add enough beef stock to cover it halfway. Tuck in your herbs and bay leaves, setting the stage for the slow braise that will transform this tough cut into tender, fall-apart goodness.
- Oven Time: With the lid snugly on the pot, transfer it to the oven. Here, the roast will gently cook for about 3 to 3.5 hours. This is where the magic happens, as the low and slow heat works its way through the meat, breaking down those tough fibers and melding the flavors of the wine, stock, and herbs into something truly special.
Adding Vegetables and Other Ingredients
For those looking to make this a one-pot wonder, consider adding vegetables like potatoes, carrots, and onions into the mix. About an hour before the roast is done, nestle these large chunks of vegetables around the roast in the pot. They’ll soak up the rich flavors of the braising liquid, becoming tender and deliciously infused with the essence of the roast.
This cooking method, steeped in tradition and patience, is a reminder of the simple pleasures of cooking. It’s about taking the time to do things right, letting the heat slowly coax out the flavors and textures that make the beef arm roast a dish worth waiting for. So, let your kitchen fill with the warm, inviting aromas of a meal made with love, and prepare for the tender, flavorful reward that awaits.
Serving and Pairing
After hours of slow cooking, the moment of truth arrives. The beef arm roast, now tender and infused with the rich flavors of herbs, wine, and stock, is ready to take center stage at your dining table. But no masterpiece is complete without the perfect frame; in this case, the sides and pairings that elevate the dish from a mere meal to an unforgettable dining experience.
Serving Suggestions
The beauty of a perfectly cooked beef arm roast lies not just in its flavor but also in its presentation. Here’s how to serve it with style:
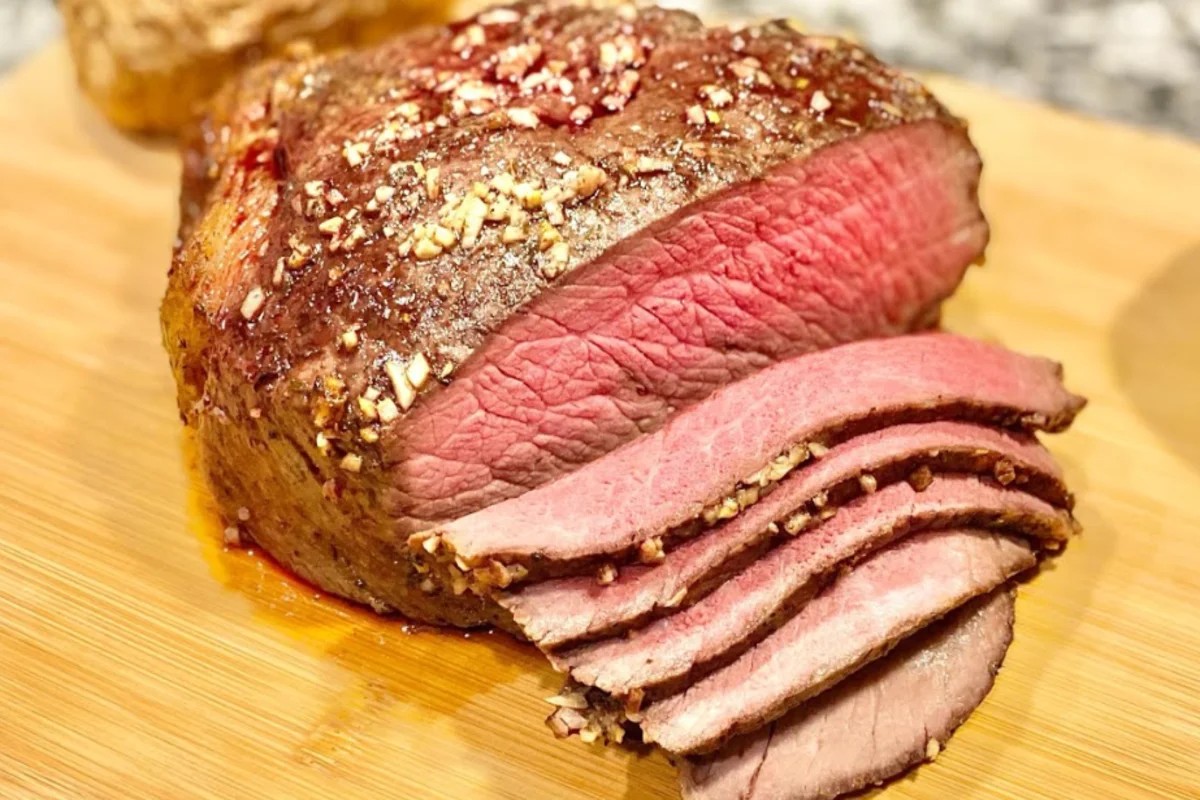
- Carving: Transfer the roast to a cutting board, letting it rest for a few minutes. Then, slice against the grain to ensure each piece is as tender as can be.
- Plating: Arrange the slices on a warm platter. Surround them with the roasted vegetables, if you’ve added them, and spoon over some of the cooking juices for that extra touch of richness.
- Garnishes: A sprinkle of fresh herbs, like chopped parsley or thyme leaves, adds a pop of color and a fresh contrast to the deep flavors of the roast.
Wine and Beverage Pairings
The right drink can complement and enhance the flavors of your beef arm roast, turning a meal into a symphony of tastes:
- Red Wine: A full-bodied red wine, such as a Cabernet Sauvignon or Merlot, mirrors the richness of the roast and stands up to its robust flavors. For a perfect pairing, consider the same wine you’ve used in cooking.
- White Wine: For those who prefer white, a rich, oaky Chardonnay can provide a nice contrast to the savory meat, balancing its richness with acidity.
- Non-Alcoholic Options: A dark, non-alcoholic stout or a richly flavored sparkling grape juice can also complement the roast well, offering depth without the alcohol.
The art of serving a beef arm roast extends beyond the dish itself, encompassing the sides, the drinks, and even the ambiance of the meal. It’s about creating an experience that delights all the senses, bringing together flavors, aromas, and textures in a harmony that celebrates the joy of cooking and eating.
So, as you gather around the table, take a moment to appreciate the journey from kitchen to plate, and enjoy the warmth and connection that only a meal made with love can bring.
Storage and Leftovers
The beef arm roast dinner has been a success, with flavors that danced on the palate and a tenderness that spoke of hours of gentle cooking. But the story doesn’t end here. Often, this hearty dish leaves behind leftovers, and with them, an opportunity to extend the culinary enjoyment. Proper storage and creative use of leftovers can turn the next day’s meals into delightful encores of the original feast.
Storing Leftover Beef Arm Roast
To ensure your leftovers remain as delicious as they were on day one, follow these storage tips:
- Cooling Down: Allow the roast and any sides to cool to room temperature. This prevents condensation inside the storage container, which can make the meat soggy.
- Airtight Containers: Transfer the leftovers to airtight containers. If possible, slice the roast before storing, making it easier to reheat portions as needed.
- Refrigeration: Store the containers in the refrigerator, where the roast will keep for up to 4-5 days.
- Freezing: For longer storage, the roast can be frozen. Wrap it tightly in freezer-safe wrap or place it in a freezer bag, squeezing out as much air as possible. Frozen roast is best used within 3 months.
Reheating
The key to reheating your Beef Arm Roast Recipe is to do so gently, preserving its moisture and tenderness:
- Oven Method: Place the slices in a baking dish, adding a few tablespoons of broth or water. Cover with foil and reheat at 325°F until just warmed through.
- Stovetop Method: For smaller portions, gently reheat slices in a skillet over low heat, adding a splash of broth to keep the meat moist.
Leftover Ideas
Leftovers offer a canvas for creativity, transforming into new dishes that keep the flavors of the original roast exciting:
- Sandwiches: Shred the beef and pile it high on crusty bread with some of the cooking juices, caramelized onions, and a slice of Swiss cheese for a gourmet sandwich.
- Salads: Slice the beef thinly and lay it atop a hearty salad of mixed greens, roasted vegetables, and a tangy vinaigrette.
- Stews and Soups: Chop the roast into bite-sized pieces and add them to a vegetable stew or soup, letting the meat simmer until it’s warmed through.
The journey of the Beef Arm Roast Recipe doesn’t end with the last bite of dinner. Through thoughtful storage and a bit of creativity, the leftovers can continue to provide comforting, delicious meals, proving that this humble cut of beef is truly a gift that keeps on giving.
FAQs
Even after the plates are cleared and the kitchen cleaned, questions may linger about the beef arm roast. Whether it’s your first time cooking this cut or you’re looking to perfect your technique, here are answers to some frequently asked questions that might help demystify the process and ensure your next roast is even better.
How do I know when my arm roast is done?
The Beef Arm Roast Recipe reaches its peak of tenderness when it’s cooked low and slow to an internal temperature of 203°F. However, the true test of doneness is fork tenderness. If you can insert a fork into the roast with little resistance, it’s ready to be savored. Remember, patience is key; rushing the cooking process might leave you with a tougher roast.
What do I do if my roast is tough?
If your roast is showing a bit of a stubborn streak and feels tough, it’s likely it hasn’t cooked long enough. The connective tissues and fats within the roast need ample time to break down fully, transforming into the tender, juicy meat we all crave. If you find yourself in this predicament, continue cooking the roast, checking for tenderness every 30 minutes. It’s a slow dance of heat and time that will eventually lead to the perfect finish.
How do you thicken the juices from the roast to make gravy?
To turn the rich cooking juices into a sumptuous gravy, start by skimming off any excess fat. Then, bring the juices to a simmer in a saucepan. In a small bowl, whisk together a tablespoon of cornstarch with a tablespoon of water to create a slurry. Gradually whisk this mixture into the simmering juices until the gravy reaches your desired consistency. Season with salt and pepper to taste, and perhaps a splash of red wine for an extra depth of flavor. Voilà, a gravy worthy of draping over your beautifully tender Beef Arm Roast Recipe.
Cooking a beef arm roast is as much about the journey as it is about the destination. Each step, from seasoning to serving, contributes to the final masterpiece. And with these FAQs in your culinary toolkit, you’re well-equipped to tackle any challenges that come your way, ensuring that each roast you prepare is a testament to your skill and patience in the kitchen.
Conclusion
In the realm of comfort food, the Beef Arm Roast Recipe reigns supreme, embodying the essence of home-cooked warmth and culinary dedication. Through the slow melding of flavors, the careful balance of ingredients, and the patience required in its preparation, this dish stands as a testament to the art of cooking. It’s a reminder that some things, especially in the kitchen, cannot be rushed. The journey from the raw, tough cut of meat to the tender, flavorful roast that graces our tables is a process filled with anticipation, care, and a bit of culinary magic.
As we’ve explored the nuances of selecting ingredients, the intricacies of preparation, and the slow alchemy of cooking, we’ve seen how each step contributes to the transformation of the Beef Arm Roast Recipe. Serving and pairing this dish with the right sides and the perfect wine elevates the dining experience, turning a simple meal into an occasion. And when the feast is over, the story doesn’t end; leftovers become an opportunity for creativity, extending the enjoyment of the roast into subsequent meals.