
Christmas Rocks
Christmas Rocks are a delightful holiday treat that combines the joy of baking with the spirit of the season. These colorful, crunchy confections are not only a feast for the eyes but also a nostalgic reminder of festive gatherings filled with laughter and love. Whether you’re looking to add a special touch to your holiday celebrations or simply want to indulge in a sweet treat, Christmas Rocks are the perfect addition to your holiday repertoire.
Key Takeaways:
- Preparation time: Approximately 30 minutes
- Difficulty level: Easy
- Main ingredients: Cornflakes, chocolate, dried fruits, nuts
- Special techniques: Melting chocolate, mixing, and forming clusters
- Storage information: Keep in an airtight container for up to two weeks
Introduction to Christmas Rocks:
Christmas Rocks have a rich history rooted in holiday traditions and celebrations. Originating in the mid-20th century, these treats are inspired by the concept of using easily accessible ingredients to create something festive and fun. Families began to experiment with different combinations of cereals, chocolates, and nuts, leading to the vibrant, crunchy bites we know today.
The significance of Christmas Rocks goes beyond just being a tasty treat. They symbolize the spirit of togetherness during the holiday season. Often made in large batches, these treats are shared with friends, neighbors, and loved ones, strengthening bonds and creating cherished memories. The act of making Christmas Rocks can also be a festive family activity, bringing everyone together in the kitchen to create something special.
Ingredients for Christmas Rocks:
- Cornflakes: The base ingredient that adds crunch and texture.
- Chocolate (milk or dark): Provides sweetness and binds the ingredients together.
- Dried fruits (raisins, cranberries, or cherries): Adds a chewy texture and fruity flavor.
- Nuts (walnuts, almonds, or pecans): Introduces a nutty taste and additional crunch.
- Mini marshmallows: Contributes softness and a chewy element.
- Food coloring (optional): To make the rocks festive and colorful.
Preparation Steps for Christmas Rocks:
1. Gather Your Ingredients: Start by measuring out all your ingredients. This makes the process smoother and ensures you have everything on hand.
2. Melt the Chocolate: In a microwave-safe bowl, melt the chocolate in 30-second intervals, stirring in between until smooth and glossy. Alternatively, you can melt the chocolate using a double boiler on the stovetop.
3. Combine the Ingredients: In a large mixing bowl, combine the cornflakes, dried fruits, nuts, and mini marshmallows. If you’re using food coloring, add a few drops to the melted chocolate at this stage and mix well.
4. Pour the Chocolate Over the Mixture: Once the chocolate is melted, pour it over the cornflake mixture. Gently fold the ingredients together using a spatula or wooden spoon, ensuring the cornflakes are evenly coated without crushing them.
5. Form the Clusters: Using your hands or a spoon, scoop out small portions of the mixture and form them into clusters or “rocks.” Place them on a baking sheet lined with parchment paper.
6. Let Them Set: Allow the clusters to set at room temperature until the chocolate hardens. You can also place them in the refrigerator to speed up the process.
7. Serve and Enjoy: Once set, your Christmas Rocks are ready to be enjoyed! Serve them at holiday parties or package them as gifts.
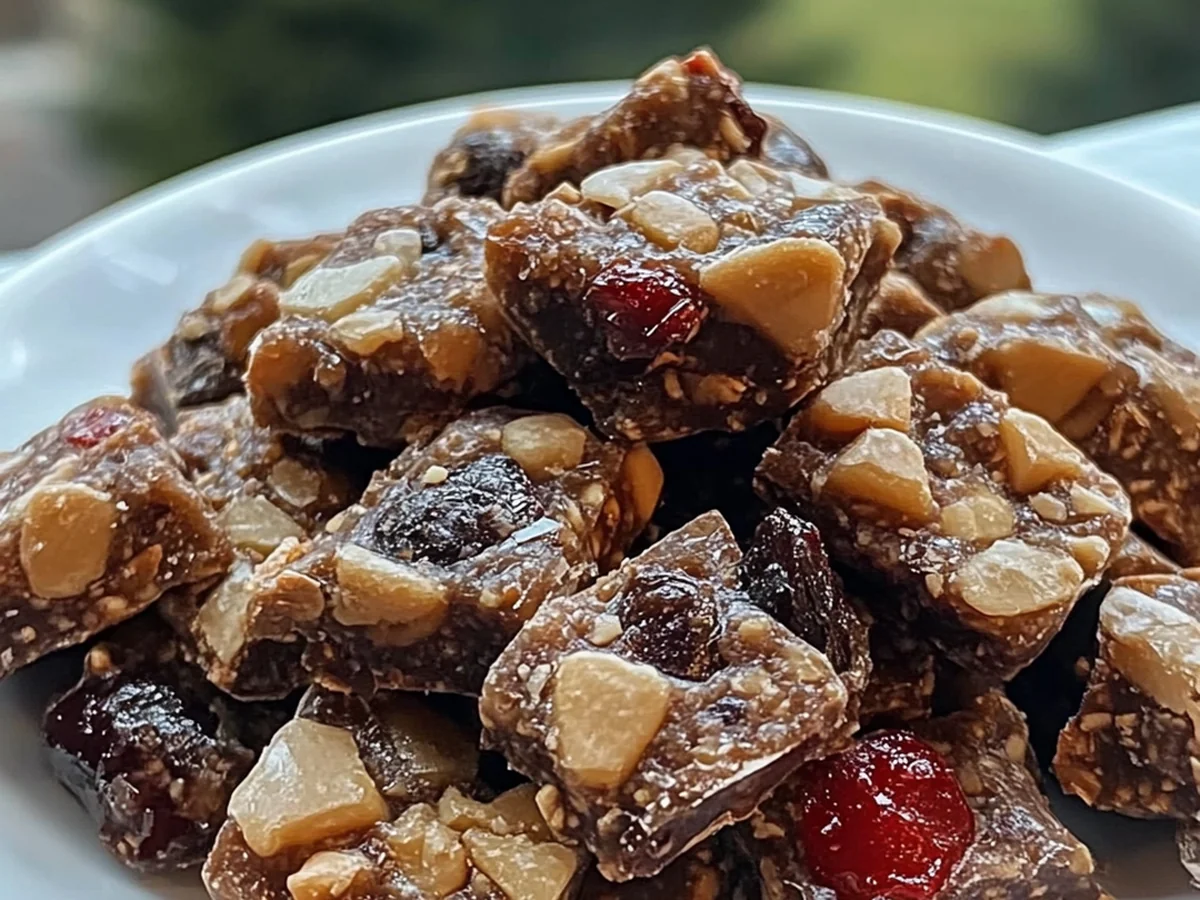
Flavor Profile of Christmas Rocks:
Christmas Rocks offer a delightful medley of flavors and textures. The crunchy cornflakes provide a satisfying crunch, while the melted chocolate adds a rich, creamy sweetness. The dried fruits introduce a burst of fruity flavor, balancing the sweetness with a hint of tartness. Nuts add a savory element and an additional layer of crunch, making each bite a delightful experience. The aroma of chocolate and toasted nuts fills the air, evoking warm holiday memories and creating a festive atmosphere.
Benefits of Christmas Rocks:
While Christmas Rocks are primarily a treat, they do offer some nutritional benefits. The inclusion of nuts adds healthy fats, protein, and essential vitamins and minerals. Dried fruits contribute fiber and antioxidants, promoting digestive health. Cornflakes provide carbohydrates for energy. However, it’s important to enjoy them in moderation, as they are still a sweet treat high in sugar and calories. The joy they bring to the holiday season and the memories created while making and sharing them are invaluable.
Serving Suggestions for Christmas Rocks:
Christmas Rocks can be served in a variety of ways. They make a perfect addition to holiday cookie platters alongside traditional cookies and other treats. You can also package them in decorative boxes or bags as thoughtful gifts for friends and family. For a festive touch, serve them in a large bowl with a sprinkle of powdered sugar or edible glitter on top. Pair them with hot cocoa, coffee, or tea for a cozy holiday treat.
Storage Tips for Christmas Rocks:
To keep your Christmas Rocks fresh, store them in an airtight container at room temperature. They can last for up to two weeks if stored properly. If you want to keep them for longer, consider freezing them. Place the clusters in a single layer on a baking sheet to freeze individually, then transfer them to a freezer-safe container. When you’re ready to enjoy them, simply remove them from the freezer and let them thaw at room temperature.
Conclusion:
Christmas Rocks are a delightful and easy-to-make treat that captures the essence of the holiday season. With their colorful appearance and a blend of textures and flavors, they are sure to bring joy to any gathering. Whether you’re making them for your family, friends, or as a festive gift, these treats are a wonderful way to celebrate the spirit of Christmas. So gather your ingredients, get creative, and enjoy making these festive delights!
FAQ Section:
1. Can I use other cereals instead of cornflakes?
- Yes! You can substitute cornflakes with rice cereal, puffed wheat, or even granola for a different texture and flavor.
2. Are Christmas Rocks gluten-free?
- It depends on the cereal and chocolate you use. Check labels to ensure your ingredients are gluten-free if you need to accommodate gluten sensitivities.
3. Can I add other mix-ins to Christmas Rocks?
- Absolutely! Feel free to experiment with other ingredients like coconut flakes, chocolate chips, or even pretzels for added flavor and texture.
4. How long do Christmas Rocks stay fresh?
- When stored in an airtight container at room temperature, Christmas Rocks can last up to two weeks. For longer storage, freeze them.
5. Can I make Christmas Rocks ahead of time?
- Yes! They can be made several days in advance, making them a convenient option for holiday gatherings.
6. What type of chocolate works best for Christmas Rocks?
- You can use milk chocolate for a sweeter flavor, dark chocolate for richness, or even white chocolate for a creamy base. Choose what you prefer!
7. Can I make Christmas Rocks vegan?
- Yes! Use dairy-free chocolate and ensure that your mix-ins (like marshmallows) are vegan-friendly.
8. How do I get my kids involved in making Christmas Rocks?
- Kids can help with mixing the ingredients, forming the clusters, and decorating the final product. It’s a fun activity for the whole family!
Full Recipe
Christmas Rocks

Ingredients:
- 1 cup walnuts
- 1 cup almonds
- 1 cup pecans
- 1 cup pitted dates
- 1 cup candied cherries
- 2 cups candied pineapple
- 1 cup dried cranberries
- 1/2 cup all-purpose flour, divided
- 1/2 cup butter, softened
- 1/3 cup brown sugar
- 1 whole egg
- 1 teaspoon ground cinnamon
- 1 teaspoon baking soda
- 1 teaspoon vanilla extract
- Non-stick pan spray

Directions:
1. Preheat your oven to 350°F (175°C) and place the rack in the top third of the oven.
2. In a food processor, pulse the walnuts, almonds, and pecans one at a time until they are pea-sized. Transfer them to a large bowl.
3. Next, pulse the dates, cherries, pineapple, and cranberries in the food processor until they are the same size. Add these to the bowl with the nuts.
4. Sprinkle 1/2 cup of the flour over the fruit and nut mixture. Toss everything together until well combined, then set aside.
5. In a separate bowl, cream together the softened butter and brown sugar until smooth. You can use a stand mixer or do it by hand.
6. Add the whole egg to the butter mixture and mix until fully incorporated.
7. Stir in the remaining flour, ground cinnamon, baking soda, and vanilla extract until everything is well mixed.
8. Pour the wet mixture over the fruit and nut blend. Combine everything by hand until evenly distributed.
9. Line four cookie sheets with parchment paper and lightly spray them with non-stick pan spray.
10. Use a small scoop to divide the mixture into 48 one-ounce drops, placing 12 drops on each cookie sheet.
11. Bake two sheets at a time in the top third of the oven for about 20 minutes. Rotate the sheets after 10 minutes, and keep an eye on the bottoms to prevent over-browning.
12. Once baked, transfer the cookies to a wire rack to cool completely.
13. Store the cooled cookies in an airtight container to keep them fresh.

Enjoy your delightful Christmas Rocks! Perfect for sharing during the festive season!