
Garlicky Dill Zingy Pickled Green Beans
If you’re looking to add a burst of flavor to your meal or a zesty snack to your appetizer spread, Garlicky Dill Zingy Pickled Green Beans are the perfect choice. This delightful recipe combines the crisp texture of fresh green beans with the bold flavors of garlic, dill, and a tangy brine that will leave your taste buds dancing. Whether enjoyed on their own or as a vibrant addition to salads and charcuterie boards, these pickled green beans are sure to impress.
Key Takeaways:
- Preparation time: 20 minutes (plus time for pickling)
- Difficulty level: Easy
- Main ingredients: Fresh green beans, garlic, dill, vinegar, water, salt, sugar, and spices
- Special techniques: Quick pickling method
- Storage information: Can be stored in the refrigerator for up to 3 weeks
Introduction to Garlicky Dill Zingy Pickled Green Beans:
Garlicky Dill Zingy Pickled Green Beans are a delightful twist on traditional pickling methods, which have been used for centuries to preserve vegetables and enhance their flavors. The process of pickling dates back to ancient civilizations, where it was a practical way to extend the shelf life of produce. This technique not only helps in preservation but also transforms the taste and texture of vegetables, making them more enjoyable and versatile.
In the United States, pickled green beans have become a beloved snack and condiment, often served alongside cocktails or as a crunchy element in salads. The combination of garlic and dill provides a fresh, aromatic quality that pairs beautifully with the crunch of the green beans. This recipe is a nod to both the history of pickling and the modern palate, offering a zingy, flavorful addition to any meal.
Ingredients for Garlicky Dill Zingy Pickled Green Beans:
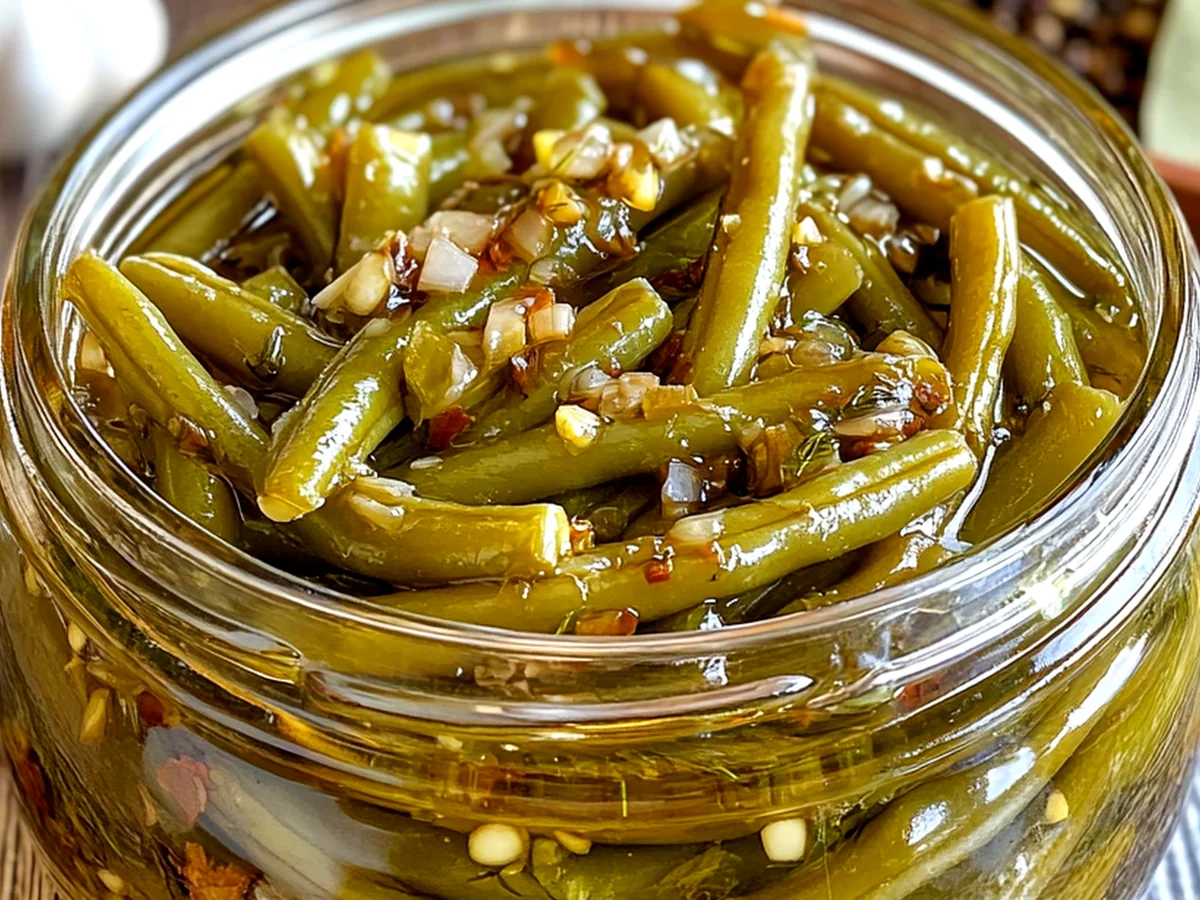
1. Fresh Green Beans (1 pound): The star ingredient, providing a crisp texture and vibrant color.
2. Garlic (4-6 cloves): Adds a robust and aromatic flavor, enhancing the overall taste of the pickles.
3. Fresh Dill (1-2 bunches): Introduces a refreshing herbal note that complements the green beans.
4. White Vinegar (1 cup): Provides the necessary acidity for pickling, balancing the flavors.
5. Water (1 cup): Dilutes the vinegar to create the pickling brine.
6. Kosher Salt (1 tablespoon): Essential for flavor and preservation, helping to draw out moisture.
7. Sugar (1 tablespoon): Balances the acidity of the vinegar and adds a hint of sweetness.
8. Mustard Seeds (1 teaspoon): Adds a subtle spice and depth of flavor to the brine.
9. Red Pepper Flakes (optional, to taste): Provides a kick of heat for those who enjoy a spicy twist.
Preparation Steps for Garlicky Dill Zingy Pickled Green Beans:
1. Prepare the Green Beans: Start by washing the fresh green beans under cold water. Trim the ends, cutting off about 1/2 inch from each end for a neat presentation.
2. Sterilize the Jars: Before pickling, it’s important to sterilize your jars. Place them in boiling water for 10 minutes or run them through a dishwasher cycle without soap. Allow them to cool slightly before using.
3. Make the Brine: In a medium saucepan, combine the white vinegar, water, kosher salt, and sugar. Bring to a boil, stirring to dissolve the salt and sugar completely. Once boiling, remove the pan from heat and let it cool slightly.
4. Pack the Jars: In each sterilized jar, place a few cloves of garlic, a generous handful of fresh dill, and the mustard seeds. Next, pack the trimmed green beans tightly into the jars, standing them upright and leaving about half an inch of headspace at the top.
5. Add the Brine: Carefully pour the warm brine over the green beans, ensuring they are fully submerged. Leave a little space at the top of the jar to allow for expansion during cooling.
6. Seal the Jars: Wipe the rim of the jars with a clean cloth to remove any residue. Place the lids on the jars and screw on the rings until they are fingertip-tight.
7. Cool and Refrigerate: Allow the jars to cool to room temperature before transferring them to the refrigerator. It’s best to let them pickle for at least 24 hours for the flavors to develop fully, though they can be enjoyed as soon as they’re cool.
Flavor Profile of Garlicky Dill Zingy Pickled Green Beans:
The flavor profile of Garlicky Dill Zingy Pickled Green Beans is a delightful balance of tangy, garlicky, and slightly sweet notes. The crispness of the green beans offers a satisfying crunch, while the garlic infuses an aromatic depth that elevates the overall taste. Fresh dill adds a refreshing herbal quality that complements the acidity of the vinegar.
The brine is bright and zesty, with a hint of sweetness from the sugar, making it addictive and perfect for snacking. If you opt to include red pepper flakes, there is an added layer of warmth that rounds out the flavor experience. Altogether, these pickled green beans deliver a punchy, refreshing snack that is both flavorful and invigorating.
Benefits of Garlicky Dill Zingy Pickled Green Beans:
Garlicky Dill Zingy Pickled Green Beans are not only a delicious treat but also offer a variety of nutritional benefits. Green beans are a low-calorie vegetable rich in vitamins A, C, and K, as well as fiber and antioxidants. These nutrients support overall health, contributing to better digestion and providing essential vitamins for skin and bone health.
Garlic, a key ingredient in this recipe, is known for its numerous health benefits, including its ability to boost the immune system, reduce inflammation, and support heart health. Dill is also packed with antioxidants and has been shown to have antibacterial properties. When combined, these ingredients create a snack that is not only tasty but also wholesome, making Garlicky Dill Zingy Pickled Green Beans a guilt-free addition to your diet.
Serving Suggestions for Garlicky Dill Zingy Pickled Green Beans:
Garlicky Dill Zingy Pickled Green Beans can be enjoyed in various ways, making them a versatile addition to your culinary repertoire. Serve them as a standalone snack, providing a crunchy and flavorful bite that pairs well with cocktails, beer, or wine during gatherings.
They also make an excellent addition to charcuterie boards, where their vibrant color and zesty flavor can brighten up the spread. Additionally, these pickled beans can be sliced and added to salads for a crunchy texture or used as a garnish for sandwiches and wraps. Their zingy flavor profile can enhance dishes like grain bowls or tacos, adding a tangy contrast to richer ingredients.
Storage Tips for Garlicky Dill Zingy Pickled Green Beans:
For optimal freshness, store your Garlicky Dill Zingy Pickled Green Beans in the refrigerator. The pickles will keep well for up to three weeks. Ensure that the beans remain submerged in the brine to maintain their crunch and flavor. When stored properly, the flavors will continue to develop, making them even more delicious over time.
If you wish to extend their shelf life, consider canning them using proper canning techniques. This method requires specific equipment and procedures but can yield shelf-stable pickles that last for months. However, for quick consumption and flavor, refrigerator pickling is the easiest and most effective method.
Conclusion:
Garlicky Dill Zingy Pickled Green Beans are a flavorful and nutritious treat that can brighten up any meal or snack time. With their crisp texture and bold flavors, these pickles are not only easy to make but also incredibly versatile. Whether you’re enjoying them straight from the jar or incorporating them into your favorite dishes, this recipe is sure to become a staple in your kitchen. So why not give it a try? Your taste buds will thank you!
FAQ Section:
1. How long do the pickled green beans last?
They can last up to three weeks in the refrigerator if stored properly.
2. Can I use other vegetables for pickling?
Absolutely! This brine works well with other crunchy vegetables like carrots, cucumbers, or radishes.
3. Do I need to can the green beans for long-term storage?
If you want to store them for longer than three weeks, proper canning techniques are recommended.
4. Can I adjust the spice level?
Yes! You can add more or fewer red pepper flakes to tailor the heat to your preference.
5. Are pickled green beans gluten-free?
Yes, this recipe is naturally gluten-free, making it a great option for those with gluten sensitivities.
6. How can I use leftover brine?
Leftover brine can be used to pickle other vegetables or as a flavorful addition to salad dressings and marinades.
7. Can I use frozen green beans?
While fresh green beans yield the best texture, you can use frozen ones if fresh are unavailable. Just thaw and drain them before pickling.
8. What should I do if I see bubbles in the jar?
Bubbles are normal and indicate that the pickling process is active. Just ensure the beans stay submerged in the brine for best results.
Full Recipe
Zesty Pickled Green Beans with Garlic and Dill

Ingredients:
- 1 pound fresh green beans, trimmed
- 2 cups distilled white vinegar
- 1 cup water
- 1 tablespoon kosher salt
- 4 cloves garlic, peeled and lightly crushed
- 1 tablespoon sugar
- 1 tablespoon dill seeds
- 1 teaspoon red pepper flakes (adjust to taste)
- 1 teaspoon black peppercorns
- 1 teaspoon mustard seeds
- 1 bay leaf

Instructions:

1. Prepare the jars: Sterilize four pint-sized glass jars and their lids by boiling them in water for 10 minutes. Allow to cool slightly before use.

2. Blanch the green beans: Bring a large pot of water to a boil. Add the trimmed green beans and blanch for 2-3 minutes until bright green and slightly tender. Immediately transfer them to an ice bath to stop the cooking process. Drain and set aside.

3. Make the pickling brine: In a medium saucepan, combine the distilled white vinegar, water, kosher salt, sugar, garlic, dill seeds, red pepper flakes, black peppercorns, mustard seeds, and bay leaf. Bring the mixture to a boil over medium heat, stirring until the salt and sugar dissolve completely.

4. Pack the jars: Once the brine has boiled, remove it from the heat. Pack the blanched green beans into the prepared jars, standing them upright. Distribute the garlic cloves evenly among the jars.

5. Pour the brine: Carefully pour the hot brine over the green beans, ensuring they are fully submerged. Leave about 1/2 inch of headspace at the top of each jar. Wipe the rims of the jars with a clean cloth to ensure a proper seal.

6. Seal the jars: Place the sterilized lids on the jars and screw on the metal bands until they are fingertip-tight.

7. Process the jars: Process the jars in a boiling water bath for 5-10 minutes to ensure a proper seal. Make sure the water covers the jars by at least an inch.

8. Cool and store: Remove the jars from the water bath and let them cool completely on a clean kitchen towel or cooling rack. Once cool, check the seals by pressing down in the center of each lid; it should not pop back. Store the sealed jars in a cool, dark place.

Shelf Life: Properly sealed and stored, these zesty pickled green beans can last for up to one year. Once opened, refrigerate and consume within 2-3 weeks for the best flavor and texture.